Airbrush model making - the great guide for beginners and converts

-
By
Oliver K.
Plastic modeling is a popular hobby. The final touch after assembly is provided by the applied paint. In addition to spraying with a spray can or brush application, you have the option to make your model even more realistic with the airbrush process.
In the following article, you will learn how the process works, what is important when airbrushing in model making and what is important when spraying.
What is airbrush anyway and how does the process work?
Airbrush in model making refers to a special process in which you spray paint onto your model using a gun and compressed air. A small, handy airbrush gun is used, which is easy to hold thanks to its low weight and can be comfortably guided by hand when spraying.
The gun is connected to an air compressor via a hose, and is operated by a small lever. In the process, the paint flows from a container into the gun and further into the spray head. The resulting color mist is very fine, so that you succeed particularly well flowing transitions, special effects and accentuations.
With airbrush you design your model even more realistic and save time, because the paint application is faster compared to the methods with brush and spray can. Even large areas on model vehicles can be embellished with airbrush very professionally. However, for the application of the airbrush equipment some practice is necessary, for absolute beginners in painting models therefore not recommended.
Airbrush in model making - advantages and disadvantages
Compared to other techniques of paint application, the airbrush process has some advantages, but also disadvantages. The biggest advantage is the realistic look, which is only possible with airbrush in model making. Through the finest shading and effects you succeed with it a very detailed look.
Disadvantageous are the higher costs incurred for the purchase of airbrush gun plus compressor and other accessories. Also the cleaning turns out after spraying somewhat more complex.
Here you will find all pros and cons of airbrush in modeling again at a glance.
| Airbrush modeling - Advantages | Airbrush modeling - Disadvantages |
|
|
Airbrush set for modeling - this should include
If you decide to buy a set for airbrush modeling, there are various offers to choose from.
In a set for airbrush in modeling are usually included the following parts:
- Gun
- Compressor
- Air hose
- Paints (eg. E.g. LP lacquer paints or X-/XF acrylic paints from TAMIYA)
- Mixing jars
- Pipettes
- Stirring rod
Tip: Before you start with airbrush in model making, you should familiarize yourself a little with the necessary technology. In addition to the airbrush gun and compressor, it depends on the selection of suitable colors.
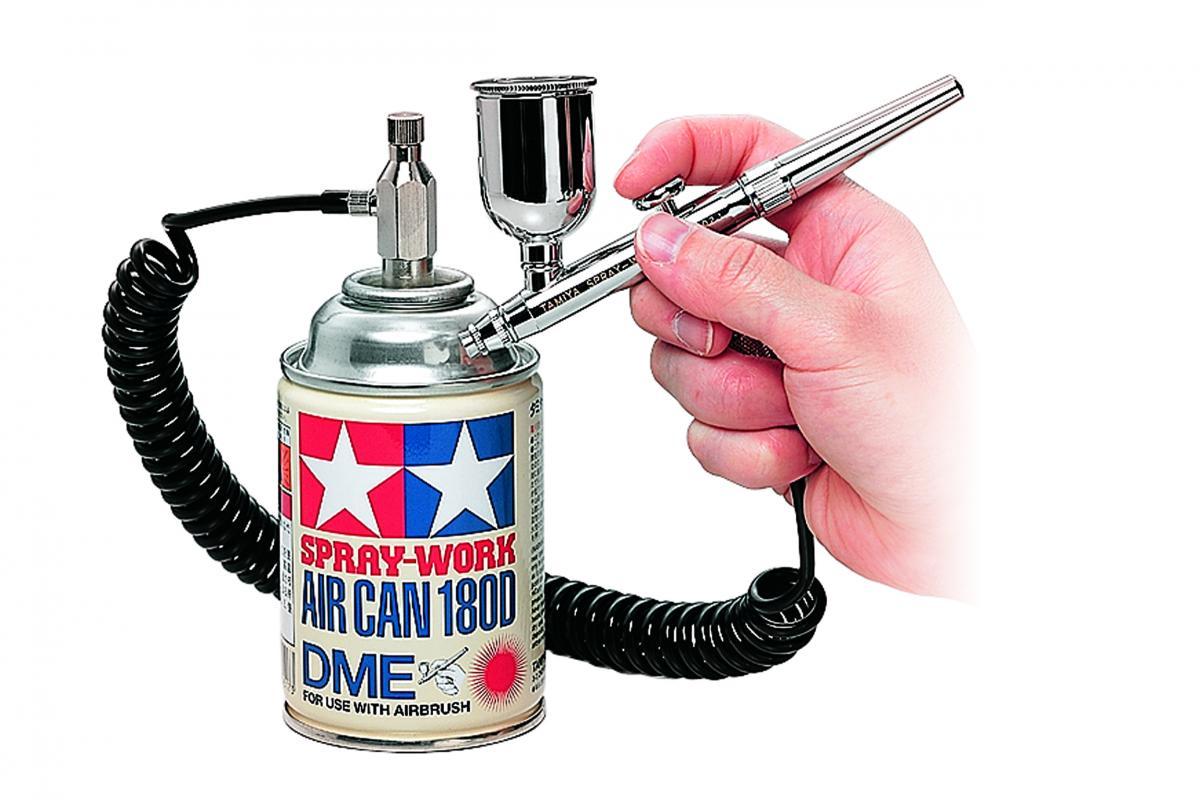
Airbrush gun in modeling
There are airbrush guns in different sizes, but the basic principle is always the same. Via the resulting air flow, the paint runs to the nozzle and is then ejected.
For airbrush in model building are particularly suitable the small versions of TAMIYA, because you can spray with it particularly fine and precise. These models are very light and small, yet they can be used to paint all surfaces. Air and colors you regulate individually, usually the finest setting is the right choice for airbrush in modeling.
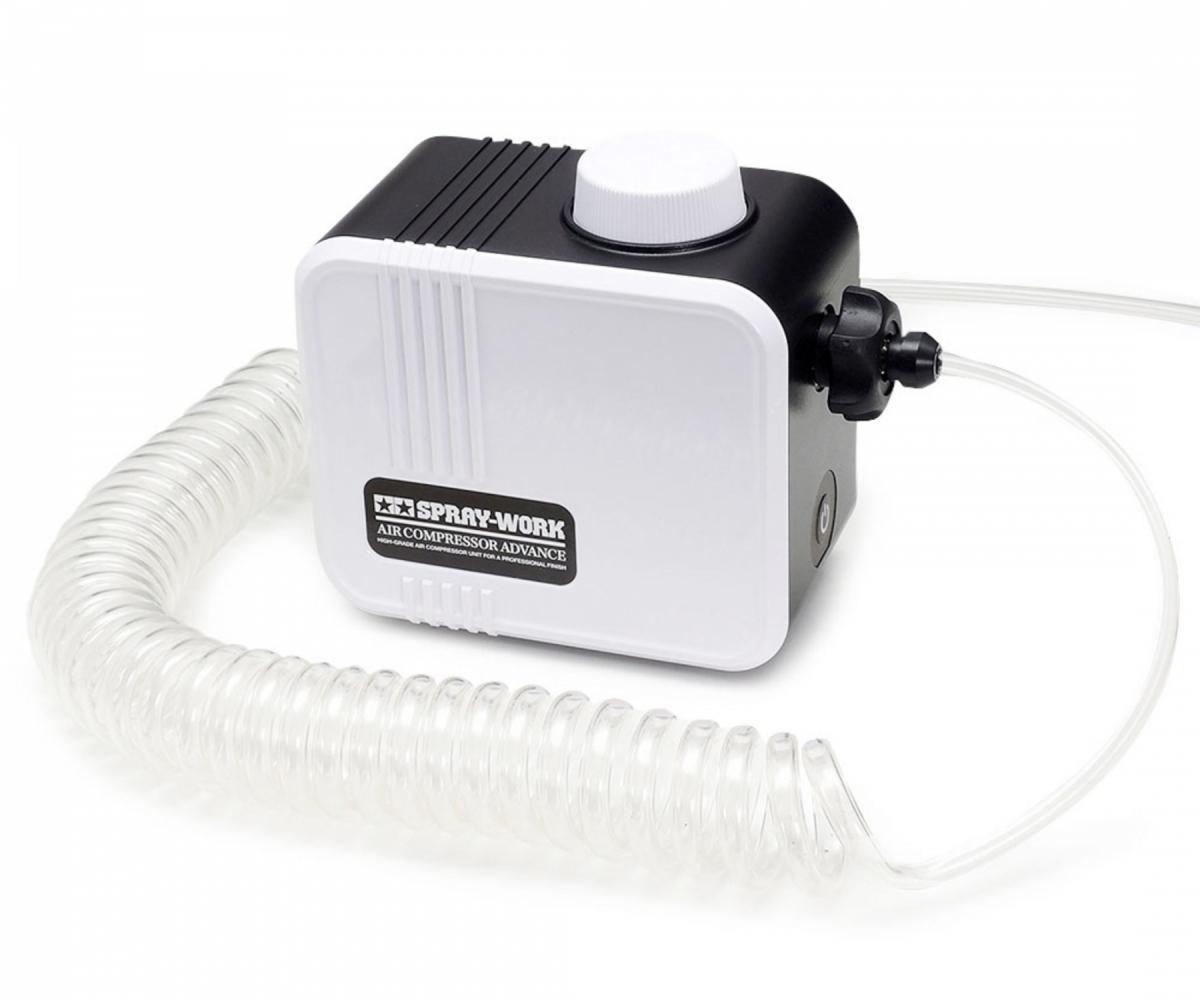
Airbrush compressor
At TAMIYA you will also find suitable compressors that generate the for the airbrush process necessary pressure. For example, the Model SW Compressor Compact or the Spray-Work Compressor Advance. These compressors are also rather small, quiet as well as compact for airbrushing in model making, making them ideal to take along.
An alternative to the Airbrush Compressor would be to connect a compressed air bottle. We recommend using a compressor, the initial cost of which is quickly amortized compared to the recurring cost of new compressed air bottles.
Airbrush colors and primer
For the airbrush process, you use special paints, for example high-quality X-/XF acrylic paints from TAMIYA, which are available in numerous shades and in matte, glossy and metallic variants. These are made from water-soluble acrylic resins that are ideal for applying paint with airbrush guns.
Alternatively, you can use LP lacquer paints from TAMIYA. These are resin paints that are specially designed for use in modeling and make your models look especially realistic after painting.
You need suitable primers if you want to lighten dark material before applying the paint or make the surface more even. Primers also ensure that the airbrush paints for modeling after spraying on better adhesion.
Tip: In addition to the TAMIYA airbrush paints you can find in the range even more practical airbrush accessories such as holders for the airbrush gun, replacement hoses, special products for cleaning or pressure regulators.
Airbrush Tutorial - Step by Step Guide
Now you finally want to get started with airbrushing in model making? If you have purchased an airbrush set for model making including accessories and colors, you can first practice spraying on paper or an old model. Practice fine lines and how you can variably change the spray result through your hand movements, the regulation of the amount of paint and air, and through the distance to the model. Have you the necessary sensitivity developed for the application of the paint mist, you can take on your model.
Proceed as follows:
- Step 1: Lay out your working material for the airbrush paint application. This includes an airbrush set with gun and a compressor, but also the desired colors and a way to store them to dry.
- Step 2: Prepare your workplace carefully. Ideal for working with airbrush is a bright environment. Daylight or a very bright daylight lamp make every little detail on the model visible and ensure that you do not forget any corner. Cover the floor with a carpet pad. The work mat protects your floor from paint splashes.
Suitable for laying out are, for example, old newspapers or cardboard boxes, which you remove easily after working again. Work in an environment that is as free of dirt and dust as possible, so that no suspended solids settle in the still wet paint.
- Step 3: Protect your airways. You usually work with water-soluble airbrush paints for modeling. Nevertheless, the finely atomized paints can penetrate your lungs and damage them with regular inhalation.
For larger painting jobs, an exhaust system is suitable, in model making and for short use, wearing an FFP2 mask is sufficient. Ventilate the room well on a regular basis and take sufficient breaks. Protect your hands with latex gloves and your eyes with safety glasses.
- Step 4: Now tape off everything that you do not want to spray paint on your model. For this purpose, special tapes are suitable for masking.
- Step 5: Now apply a primer, if necessary (see pros and cons in the next section).
- Step 6: Next, spray the first color. Start with the lighter tones and continue working your way to the darker colors. Metallic colors always come last. Hold the airbrush gun at right angles to the model when spraying and always apply the colors very thinly in airbrush modeling. You can adjust the dose on the gun. To start with, the corners and edges should be painted first, followed by the surfaces. Leave yourself enough time for the paint application, so that no color noses form.
To create a better surface appearance, you can use a so-called paint retainer (eg, Lacquer Paints drying retainer). This ensures that the paint dries more slowly and thus appears even more evenly.
- Step 7: Let all parts dry sufficiently long after each painting pass. At least four hours is recommended. Use special storage racks for small parts for safe storage.
- Step 8: Finally, apply clear coat and apply all decors to make your model even more realistic and confusingly similar to the original.
Finished is your airbrush model!
Important: When airbrushing in model making, always work out of reach of children for safety reasons.
When is priming necessary in model making?
You do not have to prime all models before applying the paint. However, in some cases it is recommended. In addition to the TAMIYA airbrush colors, you will find different primers in the range, for example in white, gray and black.
As a base for red or yellow, a white primer is ideal. For other shades, choose a primer in gray. Gold or silver, on the other hand, works best on black primer.
All pros and cons of priming for airbrushing in modeling are summarized in the following table.
| Advantages | Disadvantages |
|
|
Airbrush Tips & Tricks
Specially when painting kits, but also generally in dealing with the airbrush accessories, there are some tips that in practice helpful sind.
- Drying: For drying, a tripod or storage stand is suitable, on which you ring off over hooks and clamps parts to dry. Larger components you bring best in a dust-free place, for example in a cardboard box.
- Clear coat: After the last paint application with the airbrush gun and the expiration of the drying time follow the last details. Apply all the decals (decals) and seal everything with a glossy coat of clearcoat. Let the paint dry as specified on the packaging.
- Brush out flaws: Use polishes, sponges and sandpaper in different grit sizes, to touch up small flaws. Airbrush Cleaner is also suitable for dissolving hardened colors and repainting the areas.
- Rinse through when changing colors:If you change the color tone when airbrushing, blow through the gun several times with water or a special airbrush cleaner. Then spray until no more water runs out and fill the next color.
- Clean airbrush gun: After each use, a thorough cleaning of the airbrush gun is important. Disassemble it into all individual parts and use a special cleaner for airbrush guns.
Conclusion: Airbrush in model making - practice makes perfect
With a little practice and skill, as well as a few practical tips, you can use the airbrush process to apply various colors to your model with extreme precision. Special effects and smooth transitions, as well as the finest shading, are no problem when airbrushing in model making.
It is important that you practice the basic techniques in advance for safe handling of the airbrush gun. Try these out on a simple model with few individual parts to refine your technique more and more. If you are already a little more advanced and know the airbrush technique well, you even more complicated kits easily.
Don't forget to work in a safe environment and to protect your airways with a mask and your eyes with goggles from the very fine paint mist. Bright light, a floor cover and regular ventilation are also important when working with the airbrush process.
Airbrush guns, small and compact compressors, as well as numerous colors in versatile tones and other accessories can be found at TAMIYA in the category for airbrush products.