How to Read Tamiya Instructions Correctly: Your Roadmap to the Perfect Model
-
By
Oliver K.
How to Read Tamiya Instructions Correctly: Your Roadmap to the Perfect Model
From the very first screw to the finished high-performance model—the instruction manual is at the heart of every Tamiya kit. But how do you actually read them “correctly”? In this guide, we’ll show you how to decipher our iconic instructions like a pro, avoid common mistakes, and get the most enjoyment out of your project.
Welcome to the world of Tamiya! When you open one of our boxes, this is usually the first thing you see: a booklet or a sheet folded several times, often in black and white, covered with technical drawings, symbols, and part numbers. To beginners, this may seem like a cryptic treasure map at first glance. To experienced model builders, however, it is a precise technical document that has set the gold standard in the industry for decades.
Our assembly instructions—such as those for the legendary TT-02 chassis or the bodywork supplements for the Audi Quattro Rally A2—are designed to guide you step by step toward success. But the devil is often in the details. Why is one screw 2 mm longer than the other? What does the little “X” next to the part mean? And why should you actually read the instructions completely before making your first move?
1. The golden rule: Read before you start
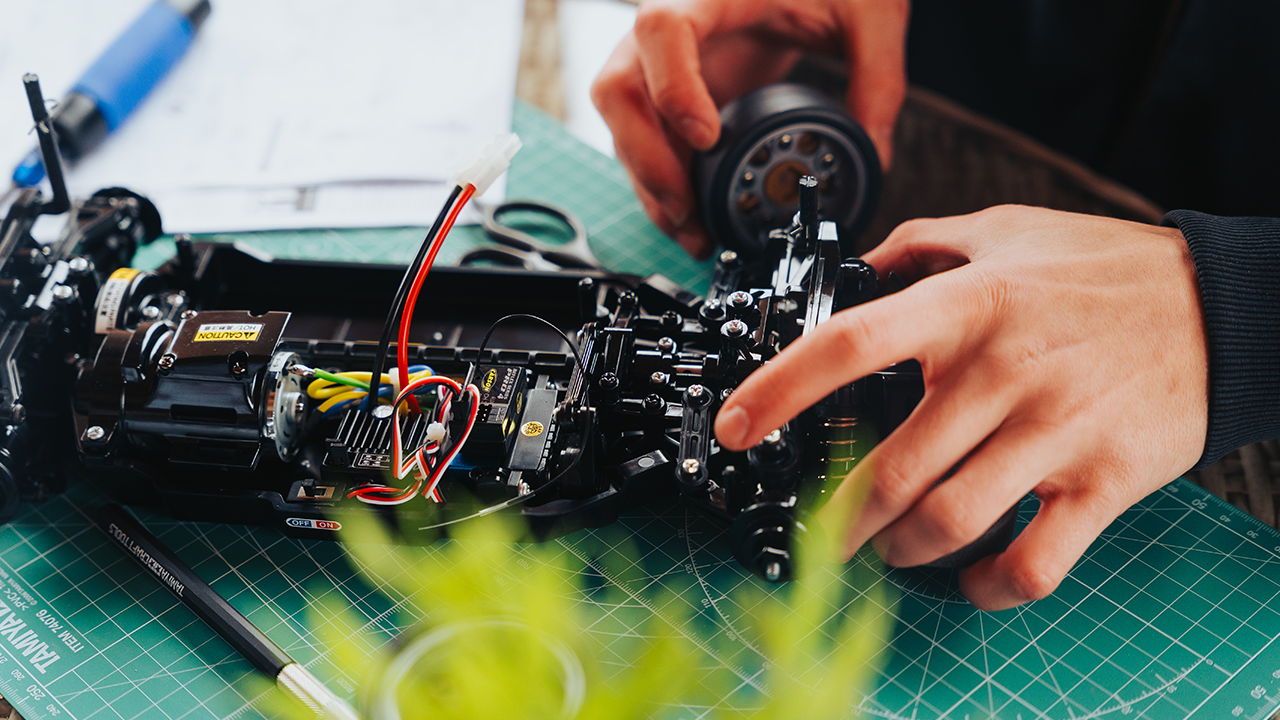
It’s the biggest temptation in model building: The box is open, the plastic parts glisten in the light, and you just want to grab your side cutters right away. But wait! The first step toward a perfect model takes place in your head.
We strongly recommend that you flip through the entire manual—from the first safety warning to the last decal sheet—at least once. Why? Because Tamiya kits are modular. For example, if you’re building a TT-02 chassis, you need to know early on what wheelbase your body requires. For the Audi Quattro Rally A2, this is 257 mm, for instance. In the TT-02 manual, you’ll find specific instructions on how to mount the rear axle to achieve exactly this wheelbase. If you just start building without following these steps, you’ll end up realizing that the wheels aren’t centered in the wheel wells—and you’ll have to take half the chassis apart again
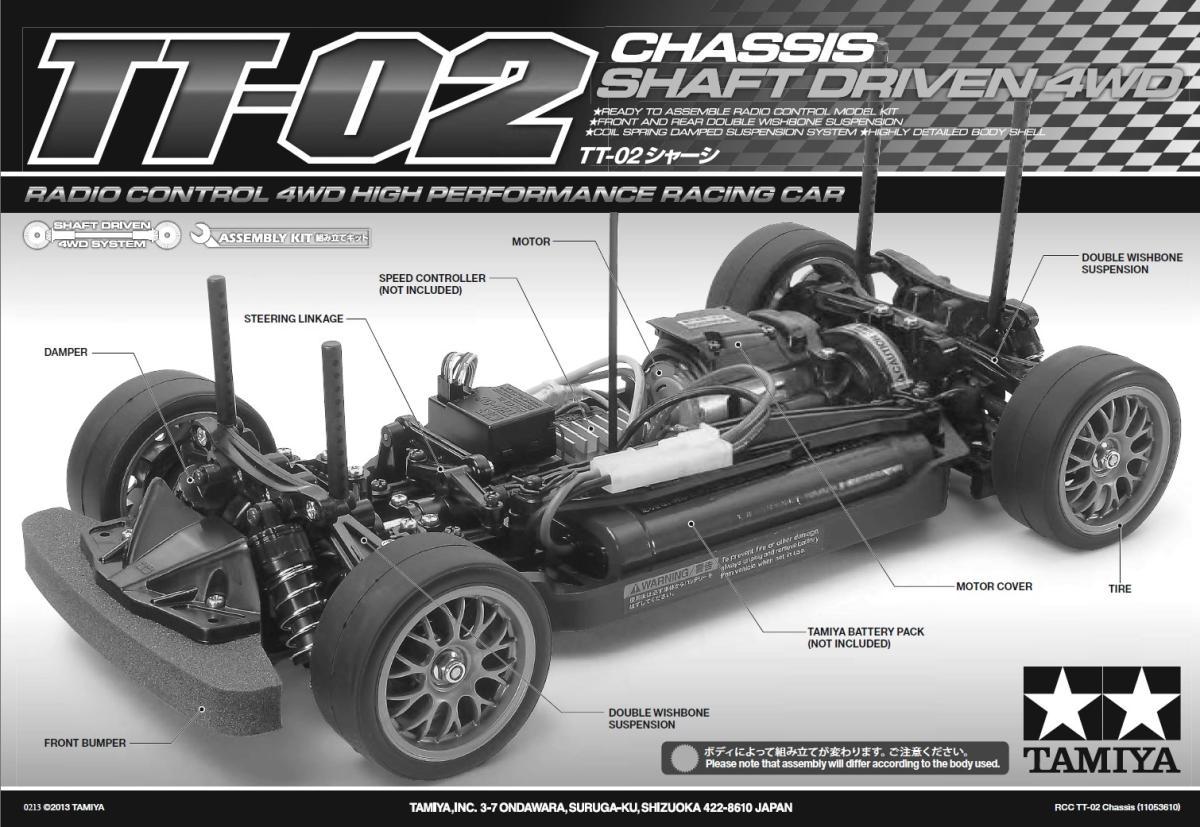
2. The Anatomy of the Title Page
Let's take a look at the title page, using the TT-02 as an example. Here you'll learn everything about your model's DNA:
Technical Specifications: Is it a 4WD drive via a propeller shaft (shaft-driven)? What type of suspension is used (double wishbone)?
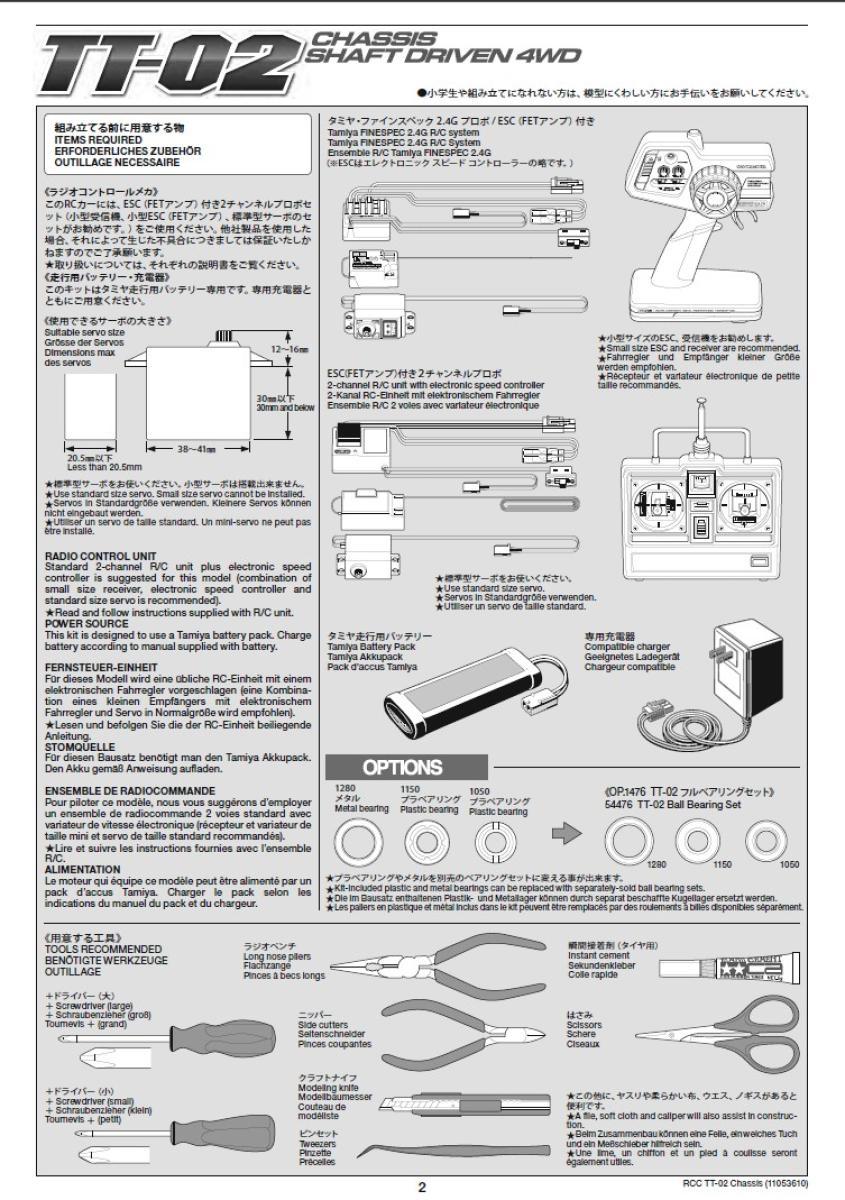
Required Accessories: Tamiya lists exactly what is not included in the kit here. These are usually the RC components (transmitter, receiver, servo), the battery, and the charger.
Tool Checklist: A crucial point. You’ll see illustrations of side cutters, hobby knives, and screwdrivers.
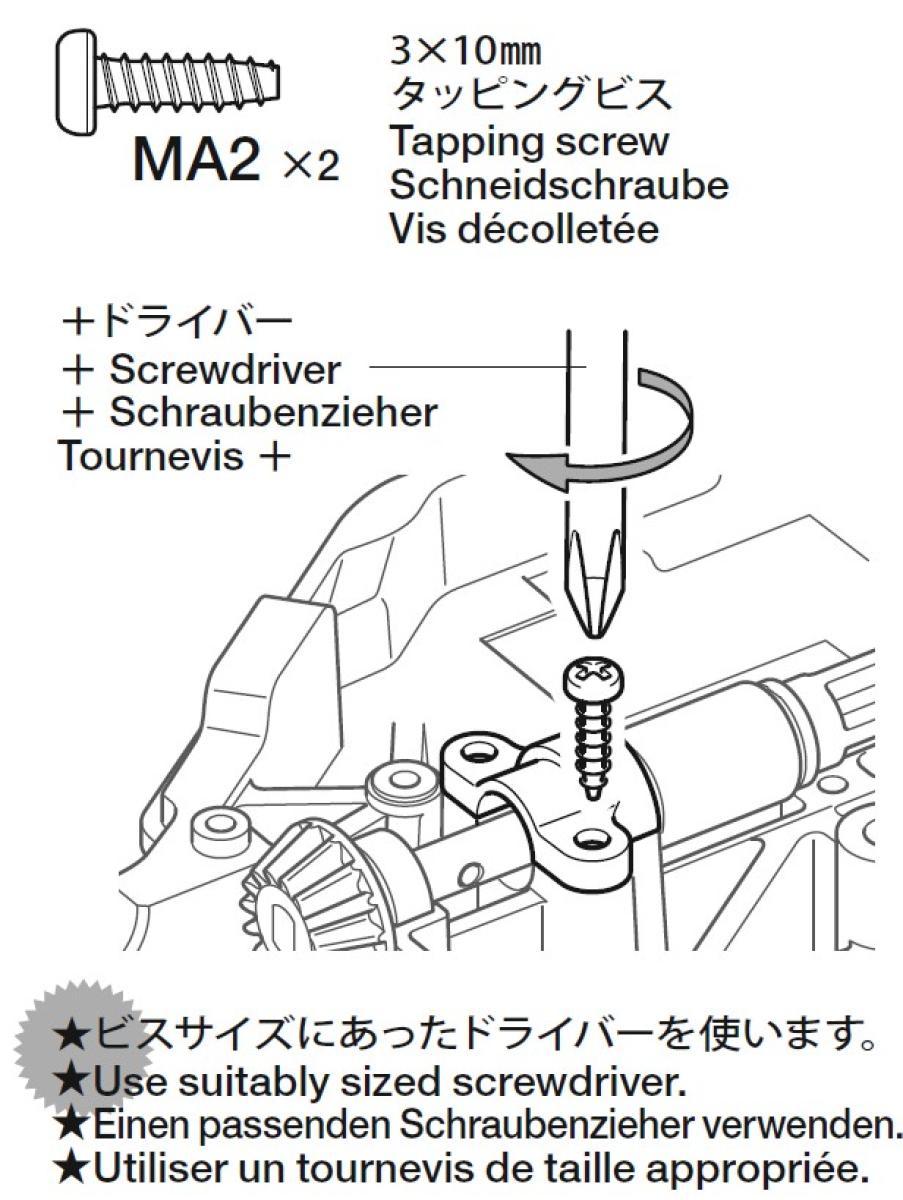
Pro tip: Tamiya uses screws that comply with the JIS standard (Japanese Industrial Standard) for almost all RC models. While a standard Phillips screwdriver often fits, it can damage the screw head if too much force is applied. Invest in a Tamiya tool set (e.g., 300074085) —your nerves will thank you.
3. The Secret Language of Symbols
Our instructions are designed for an international audience. To ensure that model builders worldwide—whether in Japan, Germany, or the U.S.—can assemble the model perfectly, we use a universal visual language. Here are the most important symbols you need to know:
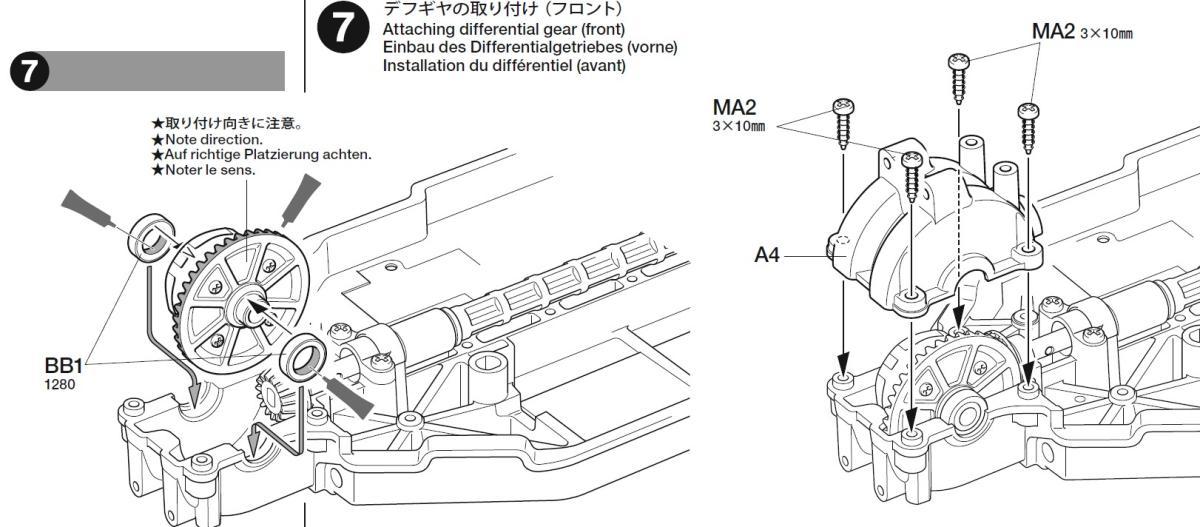
The grease icon: A small drop or a tube. This means: Grease (usually the included “Cera-Grease”) must be applied here. This is especially critical for gears and transmission parts in the TT-02.
The “X” symbol: If you see a part marked with a large X, this often means that this specific part on the sprue is not used for this model. Tamiya often uses universal sprues for different models—don’t let that confuse you.
2x6mm, 3x10mm, etc.: These are the screw dimensions. The first number is the diameter, the second is the length of the thread.
4. 1:1 images – Your best friend
One of the most common mistakes in model building is mixing up screws. A 3x10mm tapping screw looks a lot like a 3x12mm screw. If you screw the longer screw into a plastic part where the shorter one is supposed to go, you run the risk of piercing through the material on the other side.
Tamiya solves this problem in a brilliantly simple way: On the side of each assembly step, you’ll find a 1:1 illustration of the small parts needed. The technique: Take the screw out of the bag and place it directly on top of the drawing in the instructions. If it lines up exactly, you have the right part. This method also works great for washers (e.g., the 2mm Washer MC9) or metal shafts.
5. The bag system: Organization is half the fun
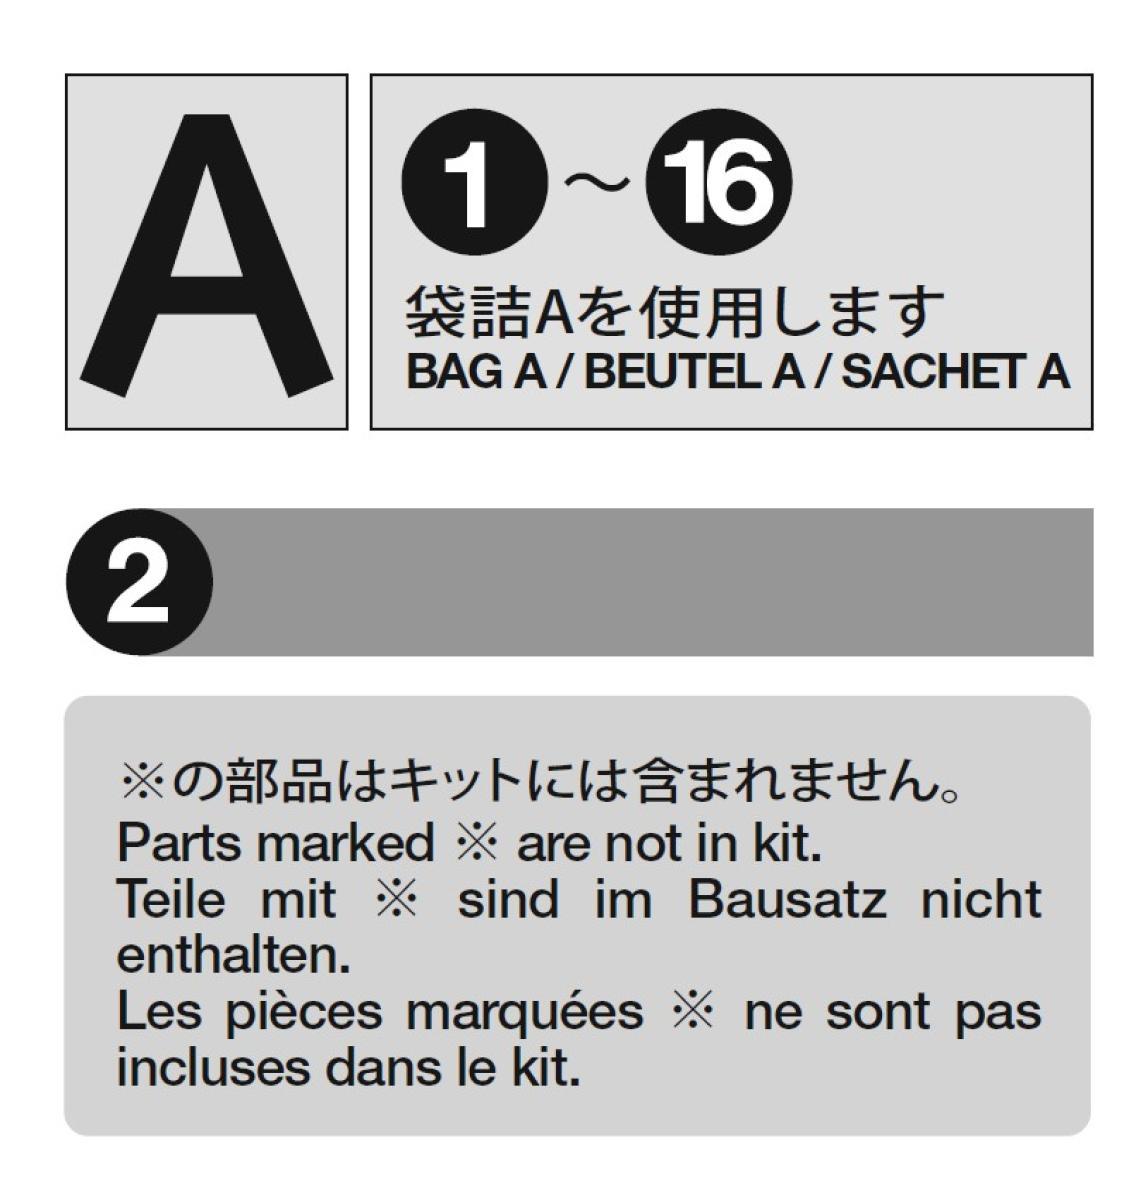
A modern Tamiya kit like the TT-02 is logically divided into bags (Bags A, B, C, etc.). The instructions will tell you which bag to open at the beginning of each section.
Bag A: Often contains the basic mechanical components, such as the gearbox and differentials.
Bag B: Suspension and axles.
Bag C: Steering and electronics mounts.
Never open all the bags at once and dump them into a large box. Chaos would be inevitable. Instead, use small sorting trays. The instructions guide you precisely through the bags—stay disciplined!
6. Special Features of Chassis Construction (TT-02 Deep Dive)
The TT-02 is arguably the most popular entry-level chassis in the world. However, it offers many options that must be carefully followed in the manual:
Motor position: Depending on the motor pinion, the motor must be screwed into the mount in different positions. The manual provides a table with letter codes (e.g., position A, B, or C). A mistake here will result in the pinion either not touching the main gear or crushing it.
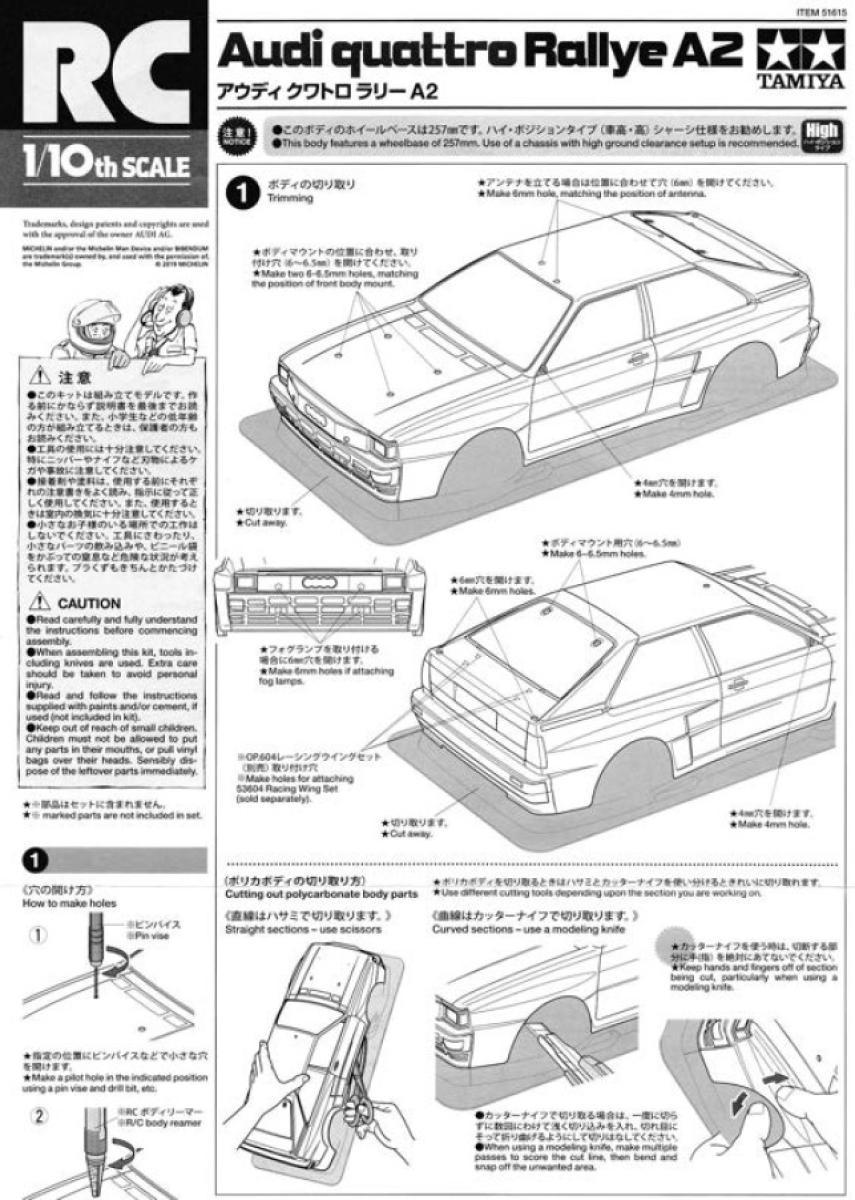
Ground clearance: You can build the TT-02 in a “high position” for rally use or a low position for the racetrack. The Audi Quattro Rally A2 supplement explicitly recommends the “High Ground Clearance Setup.” When assembling the steering knuckles, pay attention to which way they must be installed according to the diagram.
7. The Art of Bodywork: The Audi Quattro Supplement
Once the chassis is assembled, the real challenge begins: the polycarbonate body. The instructions (often a separate sheet, as with the Audi Quattro Rally A2 - 300058667) are your safety net.
Trimming: Lines on the transparent plastic show you where to cut. The instructions provide tips on tools—we recommend special curved Lexan scissors.
The Drill Holes: Specific drill holes are required for the Audi Quattro Rally A2. The insert provides clear instructions: 6mm holes for the antenna and 6 to 6.5mm for the body mounts. Use a body drill bit, not a standard metal drill bit, to avoid cracking the material.
Painting and masking: The instructions show you exactly which areas need to be masked (masking tape). Remember: Lexan is painted from the inside! The instructions also list the required Tamiya PS paints.
Decals and Details: The Audi Quattro is famous for its complex rally design. The instructions include a numbered diagram. Each decal has a number on the sheet that corresponds to the drawing.
8. Avoiding Mistakes: What to Do When Things Go Wrong?
Even with the best instructions, there can be moments of uncertainty. Here are our tips for tricky parts:
Change your perspective: Tamiya often provides an “exploded view” along with a detailed view from a different angle. Look closely at both to understand the alignment of parts (e.g., differential gears).
Dry-fit: Before applying glue (for plastic kits) or tightening screws, assemble the parts without applying force (dry-fit). If they don’t fit snugly, a part is usually upside down or a small flash from the sprue is getting in the way.
The warnings: Phrases like “Do not overtighten” are there for a reason. With plastic threads, the rule is: “Once it’s tight, it comes loose.” Tighten screws by hand until you feel resistance—that’s enough.

9. The “Insert Check”
Kits often come with correction sheets or supplementary sheets. These are extremely important! They contain updates that were made after the main instructions were printed. If you ignore the supplementary sheet, you may end up building the model based on outdated information. For the Audi Quattro Rally A2, the supplement also contains important information about the LED stop lights and special adhesive tape (heat-resistant double-sided tape), which can be crucial for the model’s operation.
10. Conclusion: The instructions as part of the experience
Building a Tamiya model is more than just the path to a finished car—it’s a meditative process, a way to develop technical understanding and patience. Our assembly instructions are your guide on this journey. If you follow them, use the 1:1 diagrams, and pay attention to the symbols, your model will not only look fantastic but also function perfectly.
Take your time, keep your workspace clean, and—most importantly—enjoy every single step of the build. From the first drive shaft to the last sponsor sticker on your Audi Quattro.
Good luck with your next project!