
Project: Power-Up - The Ultimate Guide to Converting the Tamiya TT-02 to Brushless
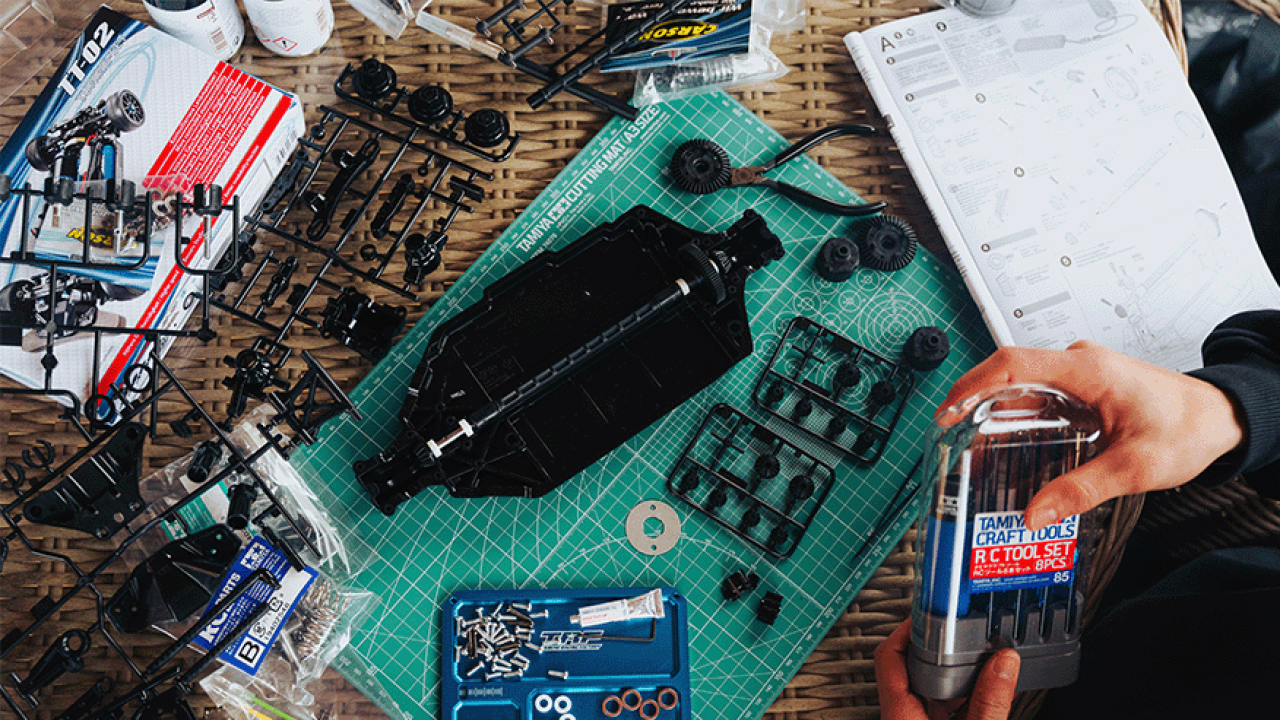
-
By
Oliver K.
1. Introduction: The Appeal of the Indestructible Classic
The Tamiya TT-02 is undoubtedly one of the best-selling and most popular RC touring car chassis in the world. Its ingenious, minimalist design makes it the perfect entry-level model. But sooner or later, every RC driver reaches a point where the performance of the stock brushed motor (Type 540) is no longer enough. The demand for more top speed, brutal acceleration, and maintenance-free efficiency grows louder. This is where a modern, electronically commutated motor comes into play. But simply installing the most powerful motor will inevitably lead to major gearbox damage and thermal meltdown. This technical guide walks you step by step through the entire process, explains the underlying physics, and provides you with tried-and-true setups to ensure that your Tamiya TT-02 brushless conversion is a complete success on the racetrack and in the parking lot.
2. Frequently Asked Questions (FAQ)
Which aftermarket parts are absolutely necessary for the Tamiya TT-02 brushless conversion?
Before your first drive, you must mechanically reinforce the chassis and install a complete ball bearing set, a steel motor pinion (module 0.6), and an aluminum driveshaft. The original plastic and brass bearings melt immediately at high RPMs and damage the steering knuckles.Why does my car stutter when starting off (cogging)?
This usually happens with sensorless systems when the gear ratio is set too high. The simplest solution is to use a shorter gear ratio or switch to a sensor-based system, which continuously transmits the exact rotor position to the controller and thus guarantees a smooth start.How hot can my brushless motor get while driving?
Brushless motors are by no means immune to overheating. Since the magnets in the rotor can become permanently demagnetized at temperatures of approximately 85 °C or higher—and thus lose their performance—regular temperature monitoring is vital. The motor should always remain safely below 80 °C during operation.
3. Basics: Brushed Motors vs. Brushless Technology
To understand why a brushless system is vastly superior to a traditional brushed motor, we need to take a look at the physics of electric motors. A successful Tamiya TT-02 brushless conversion requires an understanding of the fundamental differences in commutation.
The Brushed Motor
In a conventional brush motor, the windings are located on the rotating part (rotor), while the permanent magnets are housed in the casing (stator). Power is supplied mechanically via carbon brushes that slide against a rotating collector (commutator). This mechanical friction has serious drawbacks:
● High-speed sparking (brush arcing) leads to extreme wear.
● High friction losses reduce overall efficiency (often only 50–60%).
● Heat is generated inside the rotor and is difficult to dissipate.
The Brushless Motor
With a brushless motor, the principle is reversed. The windings are permanently mounted inside the housing (stator), while the high-energy permanent magnet (usually a sintered neodymium rotor) rotates on the motor shaft. Commutation—that is, the controlled reversal of the magnetic fields—is performed entirely electronically by the electronic speed controller (ESC). This offers enormous advantages for the Tamiya TT-02 brushless conversion:
● No mechanical wear parts except for the robust ball bearings.
● Efficiency levels of over 85–90% mean significantly longer run times and less waste heat.
● Heat is generated on the outside of the stator and can be dissipated directly via aluminum heat sinks.
4. Upgrade Priorities: Getting the Chassis Ready
Before you open the throttle for the first time, you must mechanically reinforce the TT-02 chassis. Without these modifications, the enormous torque of modern brushless motors will cause mechanical failure within just a few battery charges. For a safe and durable Tamiya TT-02 brushless conversion, the following upgrade priorities apply:
| Component | Status | Technical Reason |
| Ball Bearing Set | Must-Have | The original plastic and brass bearings generate enormous friction, melt at high RPM, and ruin the steering knuckles as well as bearing seats. |
| Steel engine pinion (module 0.6) | Must-Have | The Tamiya kit pinion is made of very soft aluminum. High-performance brushless motors will wear down the teeth in no time. |
| Aluminum propeller shaft | Must-Have | The original plastic shaft twists under sudden brushless power and begins to vibrate excessively at top speed, which damages the chassis. |
| Aluminum Motor Mount | Nice-to-Have | Significantly improves heat dissipation from the motor to the surrounding area and permanently stabilizes the gear backlash. |
IMPORTANT WORKSHOP TIP: When installing the steel pinion, be sure to use a liquid threadlocker (e.g., Loctite 242 medium strength) on the set screw.
Due to the high-frequency vibrations generated by a powerful Tamiya TT-02 brushless conversion, unsecured screws come loose extremely quickly.
5. The Physics of Propulsion: KV, Turns (T), and Timing
5.1 The Windings (Turns / T)
The specification “Turns” (e.g., 17.5T) describes how many times the copper wire was wound around the stator pole. This significantly influences the performance characteristics of the Tamiya TT-02 brushless conversion:
● Many turns (e.g., 21.5T): High electrical resistance, lower maximum speed, but very gentle on the motor and extremely responsive to fine-tuning.
● Few turns (e.g., 10.5T): Low resistance, extremely high current flow, brutal speeds, and enormous power output; however, this requires maximum precision during setup.
5.2 The KV value (revolutions per volt)
The KV value is the motor's specific speed constant. It indicates how many revolutions per minute (rpm) the motor generates per volt of applied voltage during theoretical no-load operation.
Formula: n = KV × U (voltage)
Example: A motor with 4000 KV running on a standard 2S LiPo battery (7.4 V) theoretically achieves an idle speed of 29,600 rpm. High KV values increase current draw and require careful thermal management in touring cars.
5.3 Electronic Timing
Timing describes the time lead with which the rotating field in the stator is switched relative to the rotor position (comparable to advance ignition in an internal combustion engine):
● 0° Timing (Blinky Mode): The controller switches the field exactly at the optimal physical point. Perfect for fair, standardized racing classes and beginners.
● Positive timing (e.g., 30°–50°): The magnetic field is established early. As a result, the motor spins significantly faster in the upper RPM range but loses torque in the lower range and generates more heat.
6. A Direct Comparison of Engine Classes
Depending on your goal for your Tamiya TT-02 brushless conversion, a different power class of motor may be more suitable:
| Engine Type | Top speed | Handling | Intended Use |
| 21.5T (1,800–2,100 KV) | approx. 30–35 km/h | Extremely lightweight | Beginners, scale modeling, long-distance racing |
| 17.5T (2,200–2,600 KV) | approx. 40–45 km/h | Balanced | Perfect all-around class, club races |
| 13.5T (3,000–3,500 KV) | approx. 50–55 km/h | Sporty / Aggressive | Ambitious drivers, large asphalt tracks |
| 10.5T (3,800–4,500 KV) | over 65 km/h | Difficult to control | Only for pros with fully tuned high-end chassis |
7. The Mathematics of Speed: FDR Calculation on the TT-02
The overall gear ratio of an RC car is referred to as the final drive ratio (FDR). It indicates how many times the motor shaft must rotate for the drive wheels to rotate exactly once around their own axis. This is the most important factor in preventing thermal overload during the Tamiya TT-02 brushless conversion.
Formula: FDR = (teeth on main gear / teeth on motor pinion) × internal gear ratio (for the TT-02 = 2.60)
Assignment of motor plate positions when using the 70T main gear:
To set the correct tooth flank clearance without error, the motor must be bolted into the holes on the original motor plate that are specifically designated for this purpose:
● 16T = Position A | 17T = Position B | 18T = Position C | 19T = Position D | 20T = Position E
● 21T = Position F | 22T = Position G | 23T = Position H | 24T = Position J | 25T = Position K
8. Field-Tested Setups: CARSON & TAMIYA
Here are two tried-and-true setups to ensure a smooth Tamiya TT-02 brushless conversion project:
● Setup 1: “The CARSON Dragster Power Setup” (Category: Performance &
Reliability)
Intended use: The ultimate upgrade for hobbyists, club use and official
competitions.
Speed controller & motor: CARSON Dragster Brushless Set 1:10 (The motor and speed controller are perfectly
matched, offering precise control and brutal power without
cogging). Tuned to the appropriate, regulation-compliant KV/turns rating depending on
the chosen racing class.
Gear ratio: Optimally adjusted for each class to ensure the motor and ESC operate within the perfect
temperature range.
● Setup 2: ‘The Tamiya Pure Setup’ (Category: Brand-Faithful & Classic)
ESC & Motor: Tamiya TBLE ESC series + Tamiya TBLM motor series.
Gear ratio: Perfectly tuned in accordance with the official kit and tuning specifications
for harmonious handling that is gentle on the materials.
9. Thermal Management: Keeping an Eye on the Temperature
Although brushless motors are highly efficient, they are by no means immune to overheating. Since the high-energy neodymium magnets inside the rotor become permanently demagnetized at temperatures of approximately 85 °C or higher, regular monitoring during the first test runs is vital. Motors should ideally be operated below 80 °C and the electronic speed controller (ESC) below 70 °C. Ideally, measure the temperature directly on the motor housing with an infrared thermometer after 5 to 10 minutes of continuous full throttle.
10. Step-by-Step Conversion Guide
1. Remove the old brush system (motor and mechanical or electronic controller) and thoroughly clean the chassis tray.
2. Check the drivetrain to ensure the axles, propeller shaft, and gear differentials move smoothly.
3. Mount the pinion on the flattened side of the new brushless motor shaft, applying Loctite consistently.
4. Determine the correct motor plate based on the Tamiya chart for the selected pinion.
5. Position the electronics in the chassis and ensure clean, vibration-protected wiring (note A-A, B-B, C-C for sensor-based systems).
6. Perform ESC calibration (accurately program the neutral point, full throttle, and full brake on the transmitter).
7. Perform a careful test run on the workbench, followed by continuous
temperature monitoring during actual driving.
11. The Most Common Mistakes in the Pit Lane (Troubleshooting)
If something isn't working as expected after the Tamiya TT-02 brushless conversion, the following tried-and-true solutions may help:
1. The car stutters when starting (cogging): This usually occurs in sensorless systems when the overall gear ratio is set much too high or the motor has to move an extremely heavy load from a standstill. Solution: Use a shorter pinion.
2. The pinion’s grub screw comes loose: No liquid threadlocker was used, or the grub screw was incorrectly clamped onto the round side of the motor shaft instead of the flat side.
3. Grinding noise while driving: Incorrect tooth flank clearance due to an incorrect hole position on the motor plate. This will destroy the main gear in a very short time.